How to Upgrade Microsoft Lync to Skype for Business
Last Updated on January 17, 2022
Note that Microsoft has released a product called Microsoft Teams that is intended to replace both Microsoft Lync and Skype for Business. While Skype for Business can still be downloaded currently, users are strongly encouraged to migrate to Microsoft Teams as soon as possible.
Note that Microsoft Teams is available for purchase as a standalone license, part of a package, or there is also a free version of Teams available. If you are using Microsoft 365 (formerly Office 365), Teams may already included within your Microsoft 365 package at no additional cost!
Check out free and paid versions of Microsoft Teams today.
The rest of this original blog post discusses the previous process that was used for upgrading Microsoft Lync to Skype for Business.
Many companies use Microsoft Lync as a communications tool both internally and for hosting virtual client meetings. We've seen quite a few improvements made to Lync; however, earlier this year, Microsoft announced that Lync would be replaced with Skype for Business.
Microsoft rolled out Skype for Business this week on April 14th, and all Microsoft Lync users are eligible for the upgrade, both Lync Online and for Lync Server. Since then, we've heard several inquiries on how upgrading to Skype for Business works. We hope that this guide helps Lync Online users in the upgrade process.
Steps for Upgrading Lync to Skype for Business
- Make sure all Windows Updates (including optional updates) are complete on the computer you are trying to upgrade. Note that you will need to reboot your device after installing any updates.

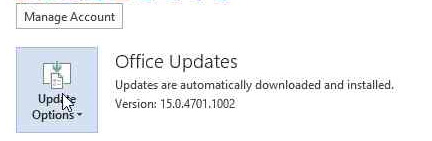 Upon completing all Windows Updates, you can open up a Microsoft Office and update the Microsoft Suite (we used Word in this example). To do so, follow the following instructions:
- Once you have a document open, click on the File Tab
- Select Account
- Click Update Options on the right- hand side
- Select "Update Now"
- Office will then automatically download the required Lync updates. You can continue to work in office programs during the download process.
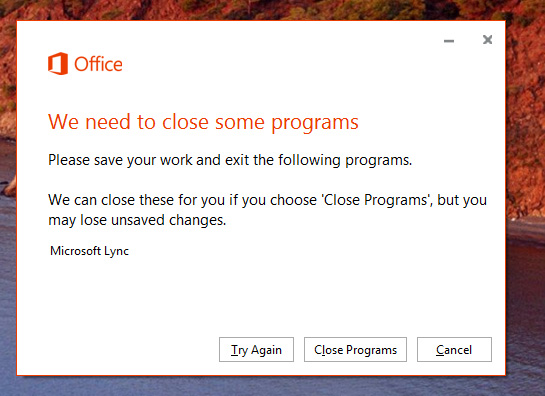
- Once the updates are downloaded, Microsoft will ask you to close Lync in order to finish the update to Skype for Business. Click "Close Programs." Microsoft will now update Lync.
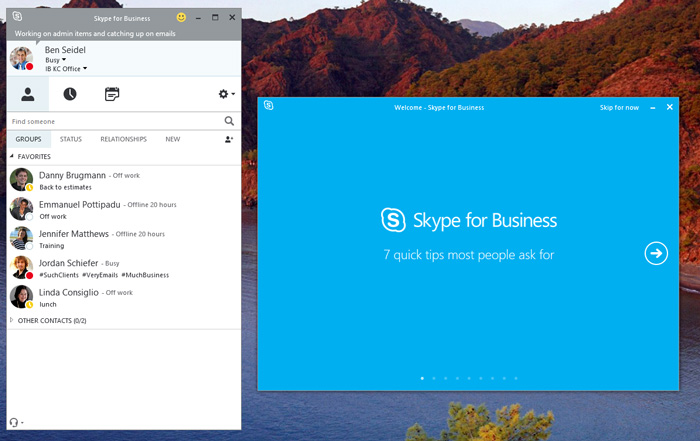
- After Lync is done upgrading to Skype for Business, the program will re-launch and attempt to sign you in automatically.
- Once logged in, Skype for Business will appear and you will see a welcome screen with 7 Quick Tips for using Skype for Business.
And that's the process – pretty simple!
Note that if for any reason you do want your system to revert to the old Lync user interface in order to delay the roll-out, or if you need more time to make your staff aware of the change, you can do so by following the instructions in this article. We do recommend using caution when applying this change as it is a more advanced process.
Click here for more information on the new features of Skype for Business. Feel free to let us know how you like the new Skype for Business in the comments below!
At no additional cost to you, we may receive a commission if you click on some of the links on this website and make a purchase.
